Simple Steamed Broccoli

IMG_6796

I made this all the time. It is so quick, yummy, and healthy. This and the Sautéed Garlicky Kale are by far the most common veggie dishes served at my house, followed closely by my Cabbage Slaw.

  • Broccoli crown
  • Olive oil
  • Sea salt

Set up steamer basket over water and turn on stove to medium.

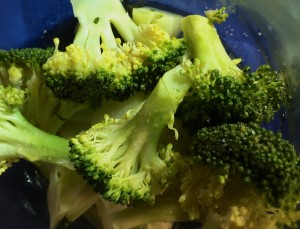
Wash and cut 1 broccoli crown into big bite-sized pieces. You can peel the stem and slice it up thinly. Put on steamer basket and cover with a lid. Let boil (you can turn it down to medium-low when it gets to a rolling boil) for about 5 minutes or until the middle is getting soft when you poke it with a sharp knife. This is the key point – make it soft enough that you are not eating mostly raw broccoli, but do not steam it to broccoli mush.

Dump it all onto a plate and drizzle with some nice olive oil (I love Saratoga Olive Oil Company on Church Street in Burlington – their Myer Lemon Olive Oil is to die for) and sprinkle with sea salt. Maybe your friends will ask you why your broccoli is so darn good, too.


PS Sometimes I get it all set up without turning the stove on before I start on other dishes and then turn it on about 10 minutes before I want to serve dinner.

Posted in Recipes, Side dishes | Tagged | Comments closed

Sauteed Garlicky Kale

IMG_6690I love using lacinato kale – the dark green dinosaur kale. Kale is my favorite vegetable, and this is my most used recipe of all times.

Heat olive oil in frying pan (medium-high) and add garlic and then the kale. Sprinkle sea salt on the kale and saute until tender, stirring frequently (about 5 minutes). Sometimes I like to add a splash of water and then put a lid on it so it will steam a bit (1-2 minutes). If there is still some water in the pan, I remove the lid for the last minute. This recipe takes no time to make. I usually make it last, while everything else is getting put on the table.

This dish goes great with Brussels sprouts, roasted chicken, sweet potato sticks, or root vegetable gratin.

To make Vietnamese Style Sauteed Kale, omit salt and add a splash of fish sauce. Also toss in some chilies with the garlic. Then add sea salt to taste. YUM!

Posted in Recipes, Side dishes | Tagged | Comments closed

Rutabaga & Sweet Potato Gratin

IMG_6689This is a great alternative to dairy-laden gratins. I use stock instead of the usual cream for the liquid. I like to use a little aged cheese, such as Gruyere or Parmesan, but this recipe is also great without. It was a huge hit with my family!

  • 2 cups onions, sliced
  • 2 sweet potatoes, peeled, sliced thinly (1/4 inch)
  • 1 rutabaga, peeled and sliced thinly  (1/4 inch)
  • 2 cloves garlic, minced, plus one for seasoning
  • 1 T thyme, crushed
  • ½ cup white wine
  • 2 cups Beef Bone Broth (or other stock), hot
  • salt and pepper to taste
  • 1 T olive oil
  • 1 cup grated Gruyere or Parmesan cheese (optional)

Heat oven to 400 degrees.

Read More »

Posted in Main courses, Recipes, Side dishes | Tagged , | Comments closed

Crispy Kale Chips

IMG_6792This is my son’s favorite way to eat kale. I made this the other day along with Roasted Chicken Legs and Sweet Potatoes Sticks and it made for a very efficient meal!

  • Kale, any kind, a half a bunch.
  • Sea salt
  • Olive oil

Chop kale. Let it sit for 5 or more minutes.

After the chicken and sweet potatoes come out of the over and off the pan, spread the kale on the pan and toss around to gather up the oils.

Sprinkle with sea salt and mix lightly with oils on pan.

Bake on 400 for 12 minutes.

Alternatively, mix kale in bowl with 1-2 tablespoons olive oil and ½ – 1 teaspoon sea salt. Spread on clean cookie sheet and bake for 12 minutes on 400 or until just crispy.

Posted in Recipes, Side dishes, Snacks | Tagged | Comments closed

Roasted Sweet Potato Sticks

IMG_6778

  • 1-2 large sweet potatoes
  • olive oil
  • sea salt

Preheat oven to 425 degrees. Cut the sweet potatoes to make long sticks about ¾ inch wide. Place on baking sheet and drizzle lightly with oil. Sprinkle the sticks with sea salt and toss gently.

Bake on 425 for 45 minutes, turning once about 25 minutes in.

These sticks can be baked at the same time, and on the same pan, as the roasted chicken legs. In fact, after the sweet potatoes and chicken come out of the oven, you can use the leftover oil on the pan for the crispy kale chips.

Posted in Recipes, Side dishes | Tagged | Comments closed

Roasted Brussels Sprouts & Chicken

IMG_6714You gotta love the one pan dinner recipes. This is not only quick and healthy, but I think these are the best Brussel sprouts ever! The lemon and the crispiness bring it home.

  • 1 pound Brussels sprouts, trimmed and halved
  • 4 small shallots, quartered
  • 1 lemon, sliced
  • 3 tablespoons olive oil
  • ¾ teaspoon salt
  • ½ teaspoon ground pepper
  • 2 cloves garlic
  • 1 teaspoon dried thyme
  • 4 large or 8 small chicken thighs

Preheat oven to 450 degrees; place rack in lower third.

Read More »

Posted in Main courses, Recipes | Tagged | Comments closed

Roasted Chicken Legs

IMG_6693

  • Chicken legs or thighs
  • Olive oil
  • Sea salt

Preheat oven to 425 degrees (high temperature ensures optimal crispiness).
Lightly brush chicken legs with olive oil.
Sprinkle with sea salt.
Bake at 425 for 45 minutes (whole leg) or 35 minutes (thigh only).
When cooking is complete, meat thermometer should read 160-170.


Posted in Main courses, Recipes | Comments closed

Veggie Compost Broth

Keep a bag or quart container near your compost bin. When you find scraps that you’d like to use in your stock, toss them in the bag and put them in the freezer. Store the bag in the freezer and bring it out when you want to use it.

  • onions, garlic, scallion, leek ends
  • carrot, ginger peels and ends
  • celery tops
  • kale stalks
  • cabbage extras
  • stems and leaves of parsley, cilantro, thyme
  • left-over chicken bones

To make stock, toss your veggie compost in 4-8 quarts of water and boil for several hours.  You can also do it in the slow cooker.

Posted in Recipes | Tagged , , | Comments closed

Bone Broth

Bone broth is deeply nutritious. The collagen gets pulled out of the bones and is the best medicine for our bones (way better than Calcium tablets!!). The broth will thicken up when it cools. The thicker the better. It’s like liquid essence.

You can use either beef marrow bones or shanks, and/or chicken bones. Also lamb bone, turkey bone, whatever you roasted up, you can use the bones. You can collect them in the freezer until you have enough to make a batch.

Here is a recipe for bone broth from un-roasted (not from roasted chicken or beef roast) bones. This is the long and most delicious version. If you are using bones left over from a roast you can skip the blanching and roasting steps. I have several variations and tips at the end that may be useful for you to customize the broth for your dietary needs (gluten free, grain free or nightshade free), so read those out before diving in.

  • 4-6 lb of marrow bones, soup bones, beef shank bones and a joint bone*
  • Olive oil
  • 1 T flour – wheat, buckwheat, sorghum or anything that you have**
  • 1-2 large onions, coarsely chopped
  • 3-4 large carrots, peeled and coarsely chopped
  • 3-4 celery stalks, coarsely chopped
  • 3-4 cloves of garlic, peeled and lightly crushed with knife
  • 1 inch ginger, sliced
  • 8-10 black peppercorns
  • 1 T white vinegar or apple cider vinegar ***

OR 1 -14 ounce can tomato puree

and/or ½ cup red wine

  • Sea salt to taste
  • Herb options (use all, some, none or others):
    • bunch parsley sprigs or stems
    • 2-3 bay leaves
    • 2-3 fresh thyme sprigs
    • 1 t coriander seed
    • 2-3 cloves or allspice
    • Star anise
    • Lemongrass, kaffir lime leaves and galangal
  • Preheat the oven to 425 and bring several quarts of water to boil in your largest stock pot.
  • Blanche the bones in boiling water for 10 minutes to remove any bitter parts. Discard the water, straining the bones.
  • Pat the bones dry and rub with olive oil and sea salt. Then rub 1 T of tomato paste and 1 T flour into the bones and place them in a large roasting pan. Roast the bones on 425 for 30-40 minutes, or on 350 for an hour.
  • Halfway through the roasting, roughly chop and lightly oil the onions, garlic, ginger and other vegetables (not the herbs) and add to the roasting pan. Check regularly, we want to caramelize but not burn them. This step is optional, but if possible, at least do the onions and garlic.
  • Once the bones and vegetables are golden and not too burnt, remove from oven. Put roasted bones in a large stock pot – put the veggies in the fridge for now. Deglaze the roasting pan with the red wine or water (heating on stove top if possible) and add to the stock pot for extra flavor. Add vinegar or tomato puree. Add enough filtered or good quality water to cover plus an inch or two.
  • Heat over medium heat, stirring occasionally, bringing to a very low simmer. Reduce the heat to lowest setting and gently simmer partially covered (or uncovered) for at least 12 hours or ideally 24 hours to extract all the marrow and gelatin from the bones. Keep the lid cracked and do not boil to prevent sourness.
  • Use slotted spoon to remove scum occasionally in the first few hours, to prevent bitterness.
  • In the last 1-2 hours, add the vegetables, bay leaf, ginger, coriander, cloves and peppercorns (whichever you are using) and continue to simmer gently
  • In the last half hour add the fresh parsley and thyme, or other fresh or light herbs.
  • Remove from heat and let cool for a while on a cooling rack or in a sink full of ice water (or out in the snow) without a lid. Remove bones from pot with tongs and strain the rest with fine mesh strainer and or cheesecloth, discarding the solids. Allow stock to cool further, then refrigerate. Once it cools, remove congealed fat but cutting into a tic tac toe shape and lifting it out of the gelatinous stock.
  • You can use this broth to drink daily as is or to make all sorts of soups! You can pour cool broth into plastic or glass containers, leaving a little room for expansion. If you are using glass, you will want to refrigerate before freezing to reduce the chance of the glass cracking. Personally, I cool the broth to nearly room temp and use quart-sized yogurt containers and a sharpie to label and date.

Here is a 12 minute video that I found helpful for learning bone stock or broth making tips:

https://drcate.com/video/how-to-make-beef-bone-broth/


Variations and tips:

*You can order these from your local farmer or grocery store. Not every supplier will offer the same array of bones, though, so be prepared to shop around. Call in advance and ask for a knee joint or similar. You can also use chicken bones, though I based this recipe on beef and lamb bone broth.

** If you are avoiding gluten or grains, use a gluten-free flour such as buckwheat or sorghum, or a grain-free flour such as tapioca – alternatively, skip this step.

***Acid helps pull the nutrients such as calcium out of the bones – you can use vinegar, tomatoes and/or red wine to do this.

An alternative to using all fresh vegetables is to use 1-2 quarts of “veggie compost,” i.e. veggie scraps that you saved over the past couple weeks. I do not recommend using cruciferous (aka brassica) vegetables such as cabbage, broccoli, or kale in your broth as the smell and flavor that they impart in the broth is not pleasant. Read more about veggie compost broth

Do not boil the broth. Boiling will turn the broth cloudy and bitter. Keeping the lid cracked wide, or off completely will help.

If you are avoiding nightshades, do not use tomato puree.

If you only have dried herbs, you can put them in a tea ball and drop them in the pot for the last hour, removing when you turn the heat off.

You can make beef bone stock without the vegetables if you want – make a soup starting with mirepoix, which will give it the great vegetable flavor, and add the stock as the liquid. For more about soup making, see my Soup Basics blog.

If there is meat on the bones that you are going to want to pull off the bones, you may find it easier to strain the bones before adding the vegetables and herbs. I sometimes cook the vegetables and herbs in the broth for an hour after removing the bones.


Posted in Healthful Eating, Nutritional information, Recipes | Tagged , , | Comments closed

The China Study Revisited

Health writer Denise Minger takes on established wisdom re: raw vegan diets. Spurred by her own negative experiences with raw food, she analyzed the data presented by T. Colin Campbell in his book The China Study and extracted new insights. Hear her discuss her findings in this True Nature Radio podcast.

Minger’s interview is an excellent summary of what I’ve been saying for years! I’m grateful that mainstream authors are beginning to see through the politics of food production. What we think we know about health is so wrapped up in poor science and capitalist ideals, and authors like Minger are finally getting to the heart of things. Her podcast is a great introduction to these concepts. Hope it piques your interest!

Posted in Healthful Eating | Comments closed